

Follow these troubleshooting steps in order. After each major step, give the camera time to restart or reconnect, then check the status light and live view before proceeding.
Step 1 — Power-Cycle the Camera
A temporary software or connection issue may cause a Lorex camera to remain offline or display an unexpected light pattern.
For a plug-in Wi-Fi camera:
- Confirm that the camera is not performing a firmware update.
- Disconnect the camera from its power source using the normal power procedure in its manual.
- Wait approximately 30 seconds.
- Reconnect the power and allow the camera to start.
- Check the LED pattern and open the live view in the Lorex app.
For a PoE camera, use the approved power procedure for the recorder or PoE switch. For a battery-powered camera, follow the model’s instructions rather than disconnecting cables that are not intended to be removed.
Do not unplug the camera while its status light indicates that firmware is being updated. Interrupting an update may cause additional problems.
If the red light returns after restarting, continue to the next step.
Step 2 — Restart the Router and Modem
If the camera is connected to Wi-Fi but cannot reach the internet, the router or modem may be responsible.
- Check whether other devices can access the internet.
- If your network is offline, restart the modem and router according to your internet provider’s instructions.
- Wait until the network is fully operational.
- Check that the camera reconnects.
- Open the Lorex app and test the live view.
If multiple cameras or other connected devices went offline at the same time, investigate the network before resetting each camera individually.
If the router has internet access but your camera remains disconnected, continue with the Wi-Fi checks below.
Step 3 — Check the Wi-Fi Connection
If your Lorex camera won’t connect to Wi-Fi, confirm that it is using the right network and credentials.
Check that:
- The Wi-Fi name and password have not changed.
- Your camera supports the router’s wireless frequency.
- The camera is within a reliable range of the router.
- The router does not block new devices through access controls or network restrictions.
- Any mesh or extender system is working normally.
If the camera was moved recently, test it closer to the router before mounting it permanently again. If it reconnects at a shorter distance, signal strength or interference may be the cause.
Do not change advanced router settings unnecessarily. First verify the camera’s supported network requirements in the official manual.
Step 4 — Reconnect the Camera After Changing Your Router
If your Lorex camera started blinking red after replacing your router, changing the Wi-Fi password or switching internet providers, it may still be configured for the old network.
Open the relevant Lorex app and check the device settings for Wi-Fi configuration or network information.
Depending on the model, reconnecting may involve selecting the new wireless network and entering its password. Other models may require activating a camera hotspot or following a specific reset-and-reconnect procedure.
For certain Lorex models, the manufacturer provides a dedicated procedure for reconnecting after a modem or router change. Follow that guide rather than applying a generic factory reset to every camera.
Check our webpage to know How to Reset Your Camera When You Change Modem or Router.
Step 5 — Check the Camera in the Lorex App
A red status light and an offline message in the app are useful clues, but they may not indicate exactly the same problem.
- Open the app and refresh the device list. Check whether:
- The camera is still associated with your account.
- The app displays a network or connection error.
- Other cameras on the same account are online.
- The camera has recently been removed, reset or added again.
- The app itself needs an update.
If the camera appears online locally but cannot be viewed remotely, the router’s internet connection or cloud access may be the issue.
If you use a recorder-based system, verify the camera status from the recorder as well as from the app. That can help separate a camera-to-recorder problem from an app or internet problem.
Step 6 — Check the Ethernet Cable and PoE Connection
This step applies to wired IP cameras connected to a Network Video Recorder (NVR) or PoE switch. It does not apply to every wireless camera.
If a wired Lorex camera displays a red status in the recorder interface, verify that the Ethernet cable is connected securely and that the camera is receiving power.
Then:
- Check the recorder or PoE switch status.
- Inspect the Ethernet cable for visible damage.
- If the model’s documentation permits it, test with a known-good cable.
- Check whether the camera appears in the recorder’s camera settings.
- Confirm that the camera and recorder are using the correct authentication details.
On some Lorex PoE systems, a red camera status after the camera has been added can indicate that its authentication details do not match those configured in the recorder. Verify the username and password through the appropriate camera settings rather than resetting the entire system.
For more information, consult the support guide for your exact PoE camera and recorder combination.
Step 7 — Update the Lorex App and Camera Firmware
Outdated app software or firmware can sometimes contribute to device-connection problems. However, you should not begin a firmware update while the camera is unstable or disconnected.
First, restore a reliable power and network connection. Then check the app store for an available update to the Lorex app you use.
Next, open the camera settings and find the firmware or device-information section if one is available. Follow the manufacturer’s update instructions.
During an update:
- Keep the camera powered on.
- Avoid disconnecting its network connection.
- Do not reset the camera.
- Wait until the update finishes and the camera restarts.
On certain Lorex models, flashing red and green indicates that firmware is being updated. If your model specifies this behavior, allow the process to complete before troubleshooting further.
Check about Keeping firmware up to date on our website.
Step 8 — Check Whether the Camera Needs to Be Set Up Again
A camera that has been reset or removed from an account may need setup before it can resume normal operation.
Open the official setup guide for the model and follow its pairing or installation instructions. Make sure you select the correct app and complete the required account, network and device steps.
For a new installation, confirm that the camera is connected to the intended Wi-Fi network or recorder. For a previously working camera, verify whether a recent reset, account change or router replacement has removed its saved configuration.
Step 9 — Reset the Camera Only If Necessary
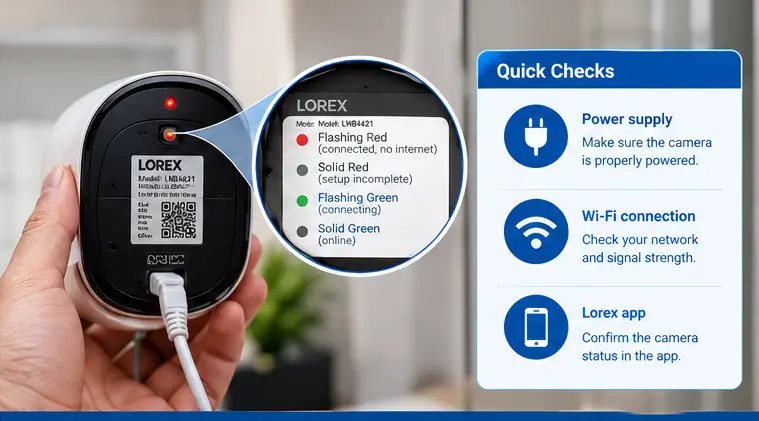
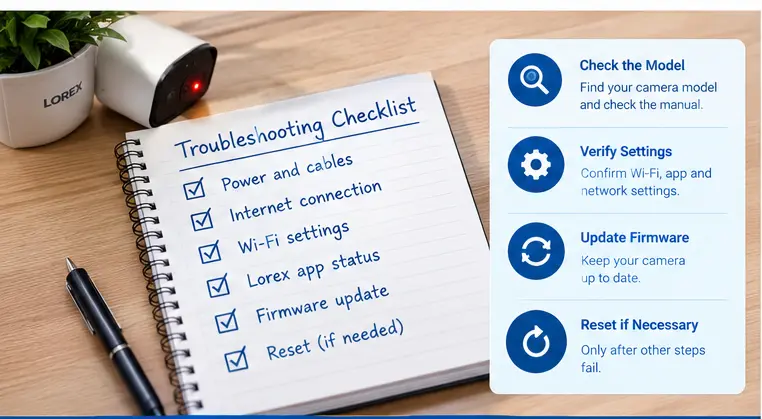
If the red light persists after checking power, internet access, Wi-Fi settings and the correct app, a reset may be appropriate.
However, Lorex cameras do not all use the same reset process. Depending on the model, a reset may involve pressing a physical button, activating a temporary setup network or following a procedure in the app.
Before resetting, find the official instructions for your exact model. Check whether the procedure is a simple restart, a network reset or a full factory reset.
A factory reset usually restores device settings to their original state and may require you to configure the camera again. It can remove saved network settings, pairing information or another configuration.
Will you lose your recordings? The answer depends on where your camera stores footage and what the reset procedure affects. A reset of the camera is not necessarily the same as formatting an SD card or resetting an NVR’s storage. Nevertheless, do not assume that recordings or configuration will be preserved. Back up important footage if possible and review the model-specific instructions before resetting.
Check our webpage to know about Reset steps for your model.
Step 10 — Test the Camera Before Reinstalling It
If the camera starts working after troubleshooting, verify the connection before mounting it back in its permanent position.
Check that:
- The status light shows the expected state for your model.
- The live view loads successfully.
- Video is clear during daylight and at night.
- Motion alerts work, if enabled.
- The camera remains online after a short period.
Remote viewing works when your phone is using a different network, if remote access is part of your setup.
For a Wi-Fi camera, test the intended mounting location for signal strength before fixing the camera permanently in place.
If the camera continues blinking red and remains offline, move to the symptom-based troubleshooting table below or contact Lorex support.
Use this table to narrow down the problem based on what you observe. The LED meanings still need to be confirmed against the camera’s official documentation.
|
Symptom |
Likely cause |
Recommended fix |
|
Lorex camera blinking red and showing offline in the app |
Network or internet connection issue |
Check the router, modem, Wi-Fi credentials and camera status |
|
Lorex camera solid red light after installation |
Setup or connection may be incomplete |
Follow the correct model-specific setup guide |
|
Lorex camera red light won’t go away after a restart |
Persistent network, configuration or model-specific status condition |
Confirm the LED meaning, check the app and follow the model’s recovery procedure |
|
Red light appears after a power outage |
Camera or router may not have reconnected properly |
Restore stable power, restart network equipment if needed and verify connectivity |
|
Camera goes offline after a router change |
Camera may still use the old Wi-Fi settings |
Reconnect using the supported procedure for your model |
|
Wired camera shows red status on an NVR |
Network, cable, power or authentication problem |
Check the cable, PoE connection, camera credentials and recorder settings |
|
Red light appears to glow around the lens at night |
Infrared night vision may be active |
Check whether the light is an IR illuminator and verify the night image |
|
Camera blinks red and green during an update |
Firmware update may be in progress on supported models |
Keep power connected and let the update finish |
Check our website to know about Lorex camera offline troubleshooting.
A reset should not be the first response to every red light. Many connection problems can be corrected by restoring power, restarting the router or reconnecting the camera to the correct network.
When a Reset May Be Appropriate
Consider a model-specific reset if:
- The camera remains offline after power and network checks.
- You changed the router or Wi-Fi credentials and the supported reconnect procedure requires a reset.
- The camera setup is incomplete and the manufacturer instructs you to reset it before pairing again.
- Lorex camera troubleshooting guide recommends resetting the device after other checks have failed.
- Before starting, identify the exact reset type and understand which settings may be erased.
When Replacement May Be Necessary
A replacement should be considered only after basic troubleshooting and model-specific checks have been completed.
Signs that may warrant a support assessment include:
- The camera does not power on with its correct, known-good power source.
- The power cable or housing is visibly damaged.
- The camera repeatedly restarts even when power and networking are stable.
- A wired camera remains undetected after the cable, PoE port and credentials have been checked.
- The device continues to fail after the manufacturer’s recommended troubleshooting procedure.
Do not open the camera housing or attempt internal electrical repairs. Doing so may create a safety risk and may affect warranty coverage.
What to Prepare Before Contacting Lorex Support
Record the camera model, the exact light pattern, when the problem started and whether any changes occurred recently.
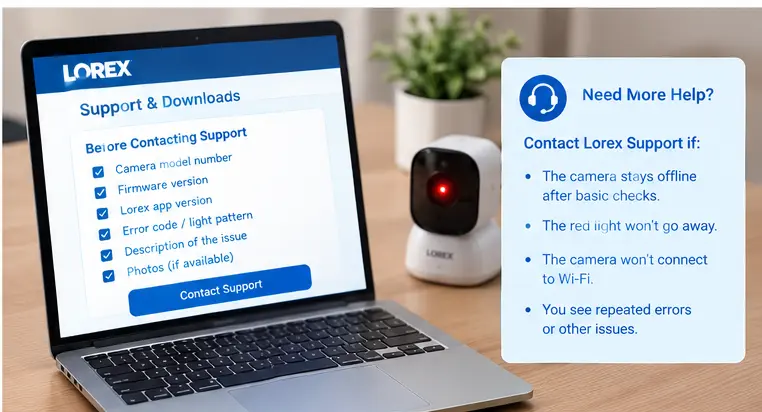
Collect the following information if available:
- Camera model number and serial number.
- The Lorex app you are using.
- Whether the camera is Wi-Fi, battery-powered, PoE or recorder-connected.
- The exact LED pattern and any displayed error message.
- Whether the problem followed a power outage, router change or firmware update.
- The troubleshooting steps you have already completed.
- A photo or short video showing the status light, if safe and practical.
This information can help support identify whether the issue is related to power, the network, setup, authentication or the camera hardware.